Festive" Cricut Vinyl Sheet Pack
- Available
-
Product number : CC-FESTIF
Highlights
- Pack of 11 Cricut sheets
- 3 different ranges: glitter, color, textured wood
- Ideal for all your creative projects
- Sheet format to test achievements
- Exclusive and original vinyl sheets
followed by 2 monthly payments
for a total of : Of which expenses
Detailed description
For all your creations with the Cricut Maker 3 or even the Cricut Joy, this pack of adhesive sheets, will allow you to test a part of our most festive range, to realize all your creative projects!
You will discover a pack of 11 adhesive vinyls (note: this pack does not include the Cricut cutting machine!) including 5 beautiful glittery cricut sheets with real glitter that does not come off, 2 beautiful textured wood effect sheets as well as 4 solid color sheets to match the glitter to create pairs.
All sheets are cut to size: 30.5 cm x 30.5 cm, allowing you to insert them directly into your Cricut Maker 3. With this "Festive" pack, you will be able to make original creations during festive periods such as Christmas, birthdays, housewarming, babyshowers... there are so many opportunities to get out your Cricut and make beautiful decorations with our "Festive" pack!
These adhesive vinyls can be stuck on any smooth surface and promise you an original result that you won't find anywhere else! Of course, we love the 5 glittery cricut sheets that will make the eyes of children and adults shine.
Each computer/telephone screen has a different calibration, so there may be a difference in color and/or texture.
If in doubt, please contact our customer service department or order a sample.
Compare products
No technical data available for this product.
-


Festive" Cricut Vinyl Sheet Pack
- 11 Cricut sheets
- Festive vinyl range
- Color, glitter, wood
No technical data available for this product.
CC-FESTIF
-

 Best sale
Discovery" Cricut Vinyl Sheet Pack
- 16 Cricut sheets
- Various finishes and colors
- Exclusive textured vinyls
No technical data available for this product.
CC-DECOUVERTE
-


Trendy" Cricut Vinyl Sheet Pack
- 12 Cricut sheets
- Trendy vinyl range
- Marble, wood, painting, color
No technical data available for this product.
CC-TENDANCE
** Unit price for the purchase of the largest quantity.
Made to order in our workshop in France


Our products are printed and cut in our workshop in Villars-les-Dombes.
We offer exclusive collections with designs created and printed in our studio. Every product ordered on our website is
made to the customer's measurements, with no possibility of retraction. Perceived color may vary from screen to screen. Before ordering, test our
free samples! And avoid being dissatisfied or making a mistake 😉
Ask for your free samples!


Tuto: need help with installation?
DOWNLOAD
Installation instructionsTools for easy installation
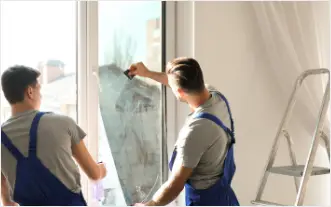
Whatever your project, the application tools and accessories offered by Luminis Films will be very useful for the success of your application! Adhesive films, electrostatic films, decorative coatings... each product has its own associated application material. Thanks to these accessories, give yourself the opportunity to apply your Luminis Films film or coating and obtain a clean and precise result by following all our application tutorials!
You'll also like
2 similar reference(s)
** Unit price for the purchase of the largest quantity.
Frequently asked questions
-
Can the adhesive coating be removed without damaging the furniture underneath?
You can remove the adhesive coating, but there's always a risk of damaging the surface underneath, as the adhesive is strong. Surfaces such as wallpaper or peeling paint are the most fragile.
Our tip for removing adhesive coatings:
- Start from a corner and pull fairly firmly
- Use a release solution to cancel out the glue's action
- Use a heat gun: the glue will soften the film and the adhesive. The adhesive coating is much easier to remove.
-
Can adhesive coating be applied to a raised surface?
Adhesive coatings can be applied to surfaces with relief, such as certain moldings. You need to master the application and thermoforming of the film, and ensure that the relief is not too pronounced.
If you'd like to give it a try, you can test it with a free sample. Alternatively, you can call in a professional fitter.
-
Can adhesive coating be applied to tiles?
The adhesive coating can be applied to any smooth, non-porous surface. On tiles, it's possible. You'll need to be careful with the joints, as the hollows at the joints may show through.
For a more aesthetic look, there are two solutions:
- Smooth the surface with a smoothing compound beforehand
- Cut tiles to size and reapply a clean grout over them
-
How do I apply adhesive coating in corners?
For a perfectly covered corner, follow our guide: "Successful installation of adhesive coverings in corners".
Entrust installation to our professionals

Treat yourself to the peace of mind of impeccable results and professional installation thanks to our network of installers!
Confirm the day and time of the job with our team, so you can take full advantage without worrying about technical and logistical details.
Your sample list
Free samples are limited to 3 references
-
No reference selected.
To select new samples, go to the product pages.
See my selection of samples
Samples


