
Le 22/09/2025
rédigé par Laura P
Customisation DIY : les meilleures réalisations de Pauline
DIY : Pauline relooke ses meubles avec de l'adhésif
Vous avez l’âme d’un artiste ? Vous aimez travailler de vos mains ? Ou vous êtes plutôt de ceux qui préfèrent rénover un meuble que de le jeter ? Alors vous êtes au bon endroit ! Pauline, passionnée de décoration et de DIY, a le coup de cœur pour la customisation de meubles. Avec des idées simples, des matériaux malins, et un petit budget, elle transforme des trouvailles en véritables trésors ! Suivez ses astuces pour relooker vos meubles sans vous ruiner.

Une table basse moderne avec du revêtement adhésif effet miroir
Pauline a flairé la bonne affaire : deux tables basses vertes trouvées pour 15 € seulement sur un site de vente entre particuliers. Solides et fonctionnelles, oui… mais côté style, elles manquaient clairement de pep’s !
Sa solution ? Utiliser un revêtement adhésif effet miroir pour leur donner une touche chic et contemporaine. Budget total : 15 € les tables + 125 € de revêtement = 140 € pour une métamorphose complète ✨
Le produit star : le revêtement miroir INDUS-2737
Ce film effet miroir a tout pour séduire :
- Effet miroir recto/verso : parfait pour les surfaces visibles sous plusieurs angles ;
- Donne une touche design et lumineuse à n’importe quel meuble ;
- Facile à poser, même pour les débutants ;
- Résistant à l’humidité, aux rayures et à l’usure quotidienne.
Le rendu final ? Une table basse qui capte la lumière et qui devient la pièce forte du salon.


Une pose rapide et facile en seulement quelques heures
Jamais posé de revêtement adhésif ? Pas de panique ! Avec quelques outils et un peu de méthode, Pauline montre que tout le monde peut y arriver 💪
1. Le matériel de pose indispensable :
- Raclette de marouflage ;
- Alcool isopropylique (pour le dégraissage) ;
- Cutter bien affûté ;
- Décapeur thermique ou sèche-cheveux.
2. Préparation de la surface :
Avant la pose, il est essentiel de préparer votre meuble :
- Poncez si la surface n’est pas bien lisse ;
- Appliquez une sous-couche si elle est poreuse ;
- Dégraissez à l’alcool isopropylique ;
- Nettoyez à l’eau savonneuse puis séchez bien.
Objectif : une surface lisse, propre et sèche pour une adhérence parfaite !
3. Pose du film adhésif :
- Décollez 10 cm du liner de protection ;
- Appliquez le haut du film en étant bien droit et aligné ;
- Marouflez de haut en bas, avec un angle de 45° ;
- Continuez à retirer le liner en marouflant au fur et à mesure ;
- Terminez avec un marouflage plus ferme pour chasser les bulles d’air.
Une opération rapide, précise, et surtout… très satisfaisante à réaliser 😍

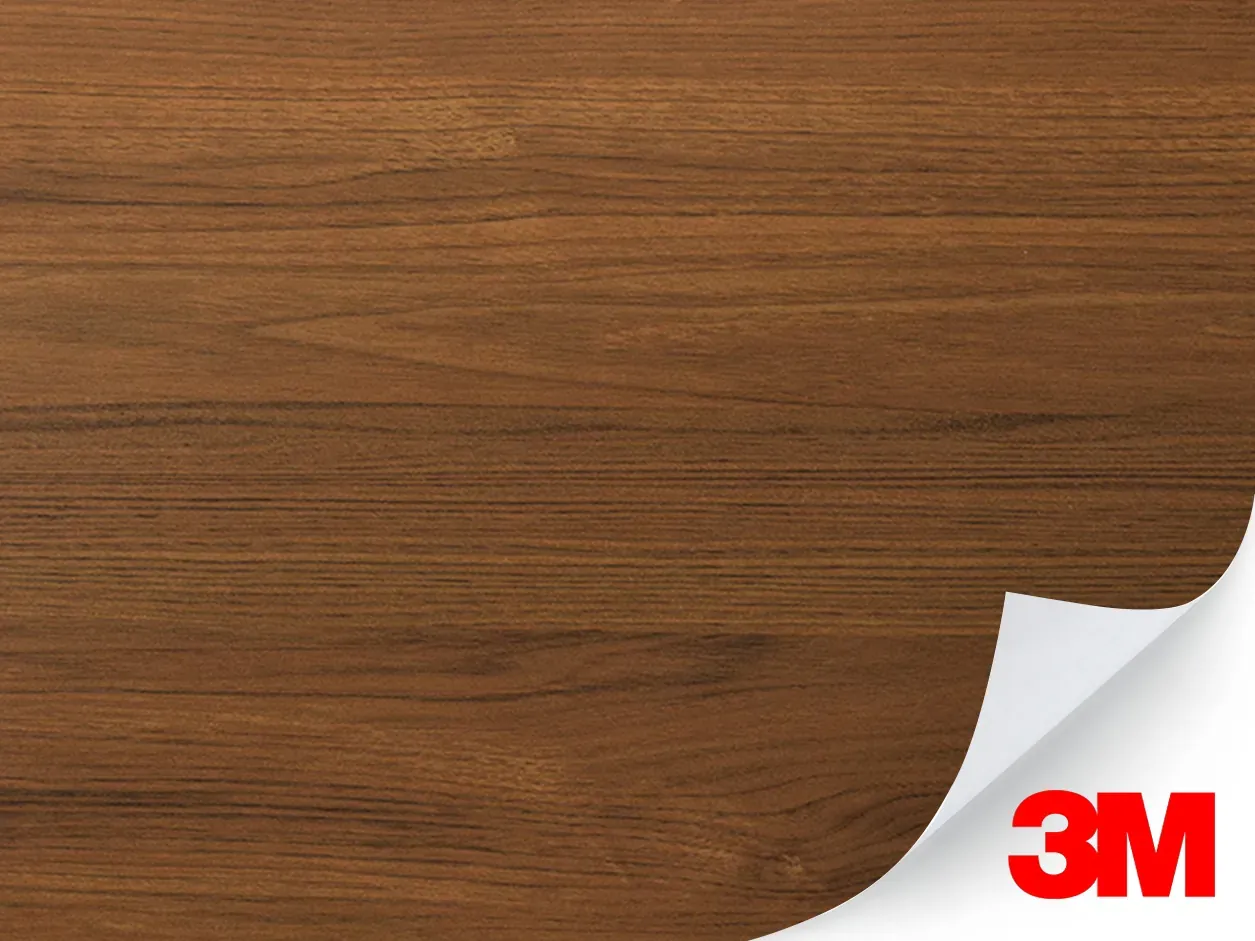
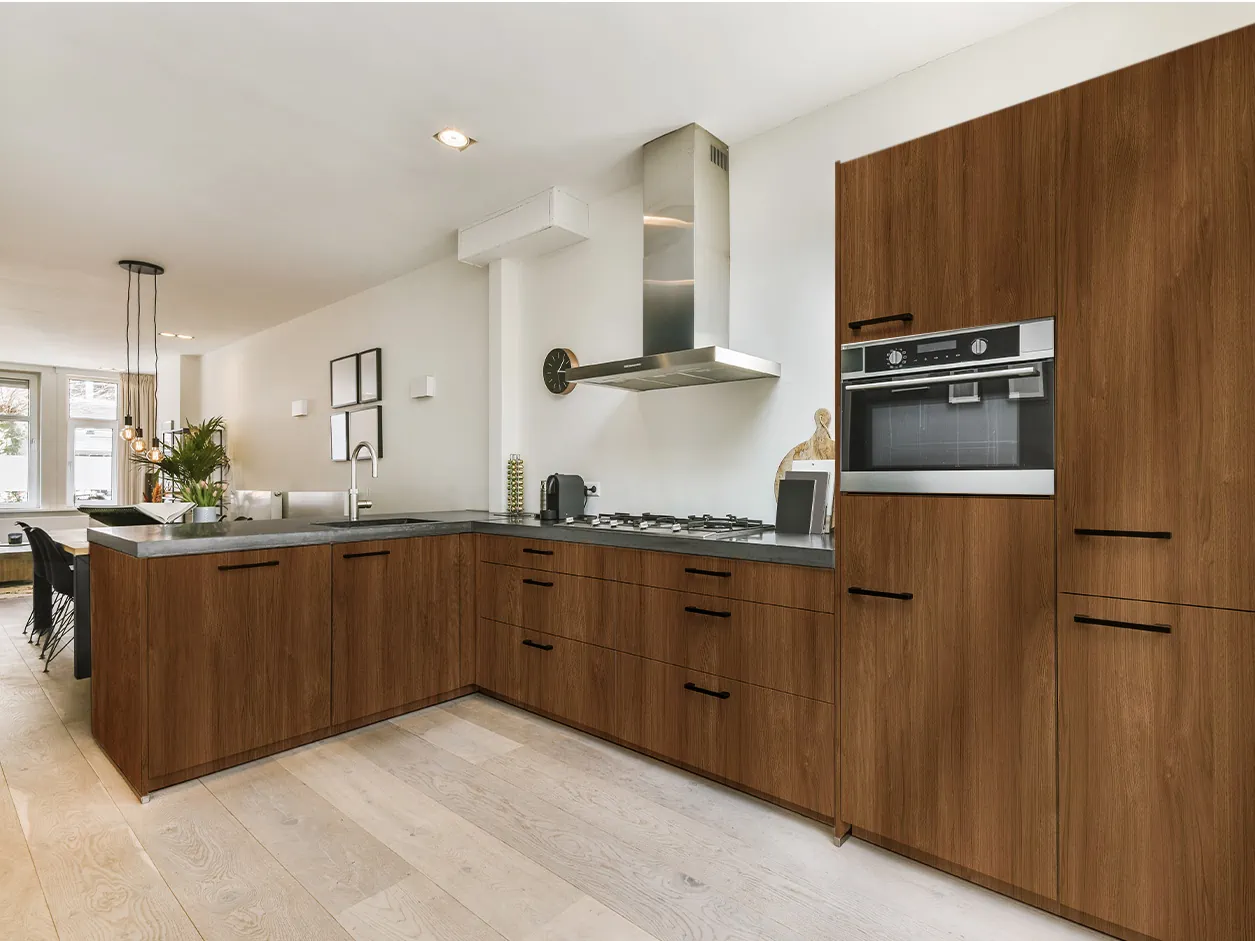
Une commode comme neuve avec du revêtement adhésif bois
On connaît tous une commode un peu oubliée, abîmée ou dépassée. Pauline, elle, a carrément trouvé la sienne dans la rue, près d’une poubelle. Plutôt que de passer son chemin, elle a vu un potentiel de transformation. Ni une ni deux : elle l’a récupérée, nettoyée, et transformée !
Son idée ? Utiliser un revêtement adhésif effet bois miel, doux et chaleureux, parfaitement assorti à son intérieur. Coût total de l’opération : 184 € pour un relooking complet, et surtout… une commode sauvée de l’oubli.
Le produit : Revêtement bois miel 3M-DW-1891-MT
Un film d’exception pour une finition haut de gamme :
- Texture bois réaliste : pour un rendu naturel au toucher comme à la vue ;
- Technologie 3M pour une durabilité supérieure ;
- Pose facile et excellente tenue dans le temps ;
- Idéal pour les surfaces planes comme les tiroirs, portes, plateaux.
Résultat ? Une commode comme neuve, pleine de charme, pour un budget mini.
Pour la méthode de pose, c’est exactement la même que pour les tables basses : facile, rapide et accessible à tous !
Grâce aux astuces de Pauline et aux revêtements adhésifs Luminis Films, redonner vie à vos meubles devient un jeu d’enfant. C’est économique, créatif et durable : plus besoin de jeter pour changer de déco !
Table basse, commode, étagère ou plan de travail… tout est customisable avec un peu d’imagination et les bons outils. Alors, pourquoi ne pas passer à l’action vous aussi ? 😃
D'autres problématiques en rapport
-

Offrez-vous un nouvel espace de travail pour la rentrée !
-

3 idées simples et économiques pour votre rénovation de salle de bain.
-

Peut-on installer du revêtement adhésif sur un plan de travail ?
-

On vous aide à vous projeter pour votre rénovation de chambre !
-

Comment moderniser une étagère avec un adhésif décoratif ?