
Le 27/07/2023
rédigé par Alice O.
Customiser une porte de placard coulissante
Vous êtes un(e) adepte de la rénovation ? Découvrez ce DIY pour rénover votre porte de placard !
Les placards coulissants sont certes, très pratiques et fonctionnels, mais bien souvent, il ne laisse pas bien place à la décoration. Souvent délaissés, ils sont néanmoins très utiles pour un relooking de chambre ou un relooking d'entrée réussi.
Vous souhaitez refaire votre chambre ou toute autre pièce ? Si vos portes de placard coulissantes ne sont pas à votre goût, découvrez cette belle réalisation !

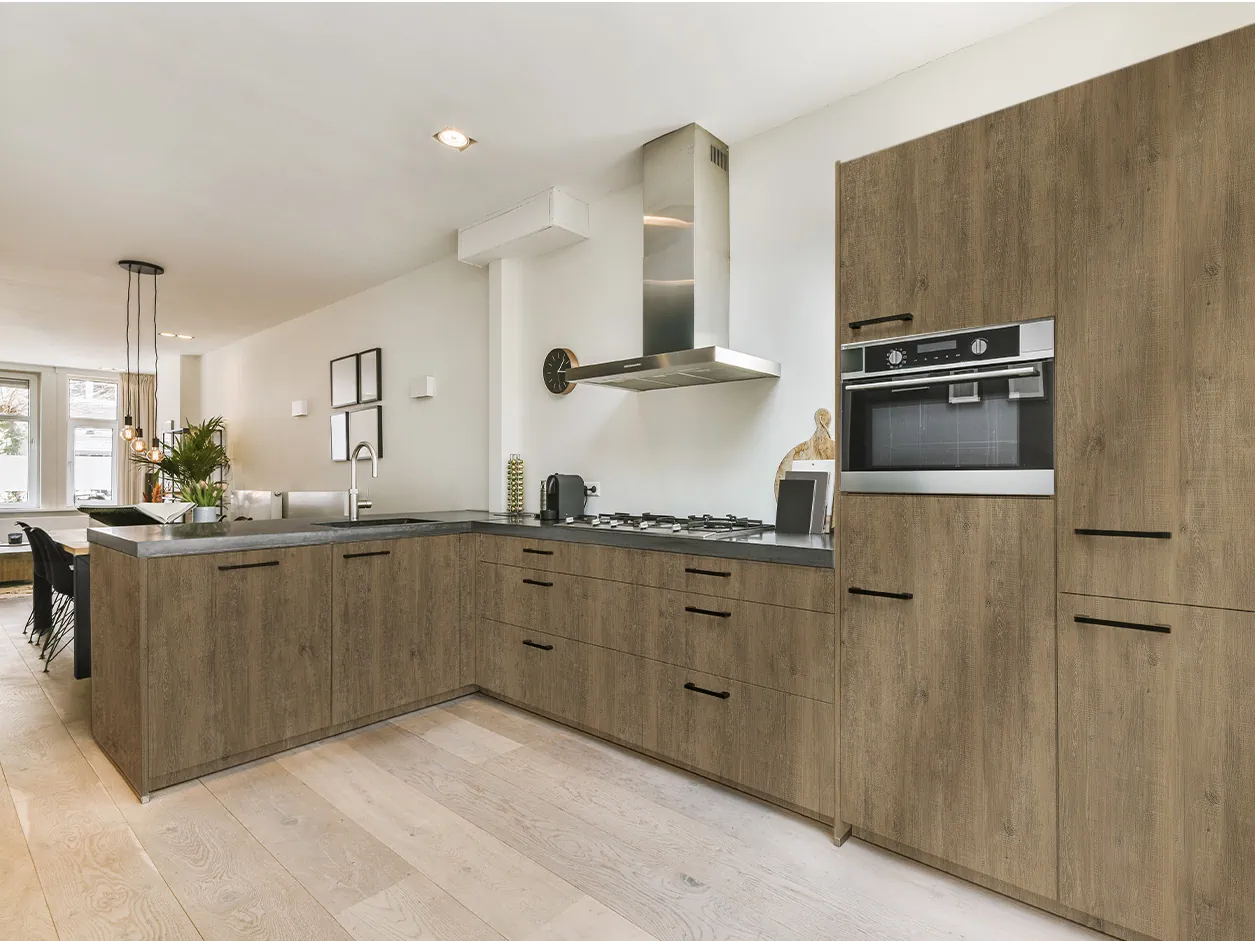
Problématique rencontrée :
Notre cliente souhaitait customiser sa porte de placard, qui était très pratique mais pas très esthétique.
Nous avons pu répondre à une problématique décorative de façon rapide, facile et à moindre coût.
L'objectif : relooker sa porte de placard en un rien de temps !

Solution Luminis Films :
Dans notre premier temps, il a fallu démonter les portes de placard, pour garantir un résultat impeccable.
Une fois installées à plat, nous avons entièrement nettoyé la surface des portes à l’aide d’alcool isopropylique pour enlever les poussières et les résidus, qui pourraient être la cause de la formation de bulles.
Ensuite c’est très simple, nous avons procédé à l’application du revêtement adhésif imitation bois à chevrons, pour un rendu incroyable !
Pour simplifier la pose, vous pouvez opter pour une découpe d’adhésif sur mesure, prête à l’emploi. Si vous préférez faire des économies, il est également possible de commander l’adhésif en mètres linéaires, puis de le découper vous-même en fonction des dimensions de votre plan de travail.
Étape 1 : prendre les bonnes mesures
Commencez par mesurer la longueur de votre plan de travail, puis ajoutez 20 cm supplémentaires. Faites de même pour la profondeur, en ajoutant cette fois 10 cm.
👉 Ces marges vous apporteront un meilleur confort lors de la pose et éviteront toute erreur de découpe.
Étape 2 : découpe de l’adhésif
À l’aide d’un cutter et d’une règle, découpez un rectangle aux dimensions obtenues (mesures + surplus). Vous êtes maintenant prêt(e) à passer à l’application.
Étape 3 : application de l’adhésif
- Décollez environ 10 cm du film protecteur (le liner).
- Positionnez la partie adhésive sur le bord du plan de travail, en vous assurant qu’elle soit bien droite.
- À l’aide d’une raclette à embout feutrine, marouflez du centre vers les bords pour éviter la formation de bulles.
- Déroulez progressivement l’adhésif, retirez le liner au fur et à mesure, tout en marouflant fermement.
Étape 4 : finition des angles
Pour des angles nets et propres :
- Coupez le surplus d’adhésif aux coins.
- Repliez l’autre côté par-dessus, en veillant à bien lisser pour un résultat soigné.
Notre sélection de revêtements adhésifs bois
Pour customiser vos portes et meubles rapidement et facilement ❤️


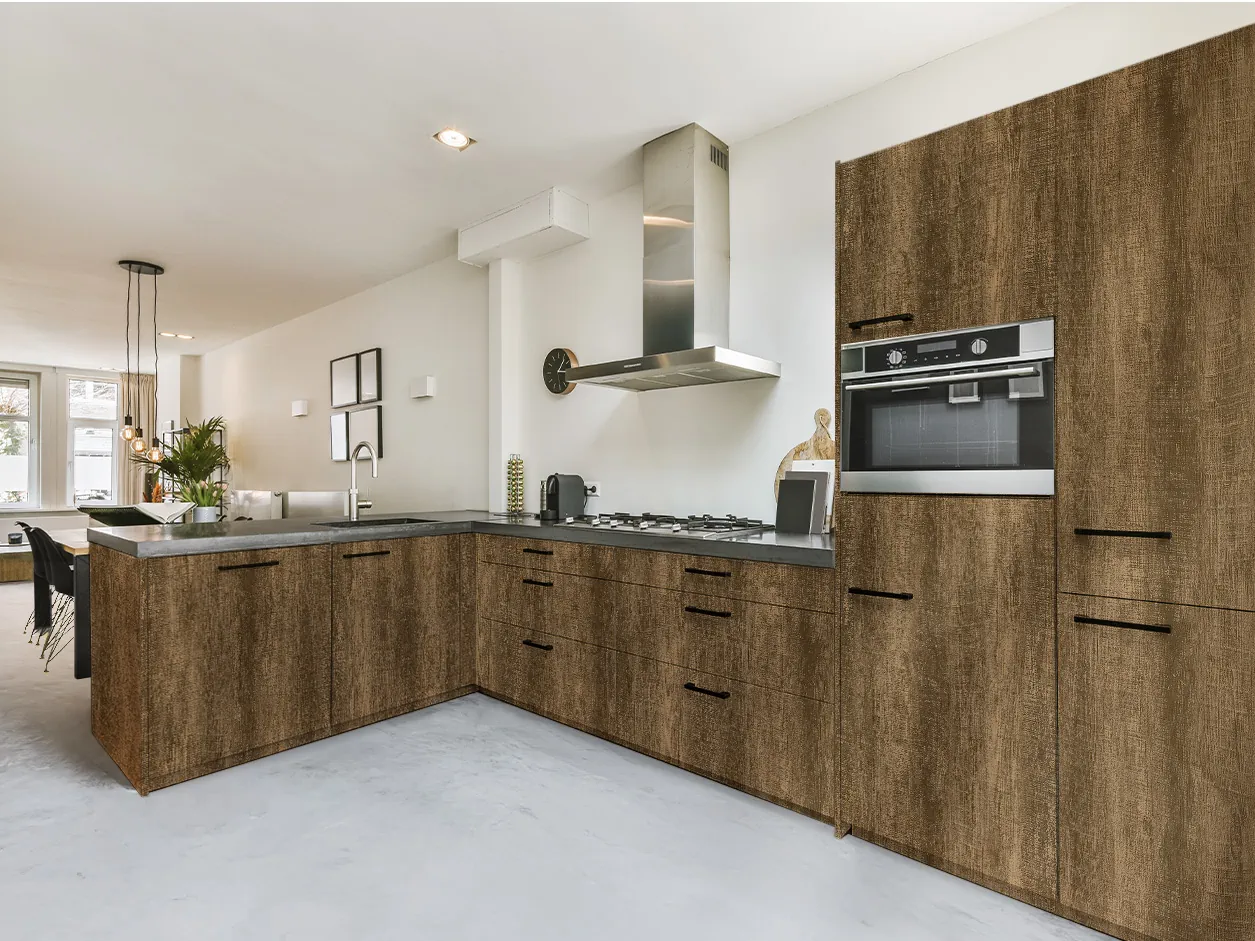


Résultat obtenu :
Une fois remises à leur place, les portes, complètement relookées, ont littéralement transformé le placard qui a pris un réel coup de jeune !
De quoi s'inspirer pour réaliser la customisation de vos portes ou d'autres objets dans votre maison 😍


