Le 11/03/2025
rédigé par Alice O.
Comment poser une crédence adhésive pour cuisine ?
Rénovez vous-même votre cuisine avec du revêtement adhésif.
Vous cherchez une crédence adhésive pour cuisine afin de rénover votre intérieur ? Alors le revêtement adhésif est fait pour vous !
Découvrez dans ce tuto comment rénover votre crédence facilement et à moindre coût grâce au revêtement adhésif Luminis Films. 😉
Tuto DIY 👇 On pose un adhésif sur une crédence de cuisine
Prenez les bonnes dimensions et recevez votre crédence adhésive
Prendre les bonnes dimensions est essentiel. Il serait dommage de se retrouver avec un adhésif pour crédence trop court !
Pour les découpes sur-mesure (en un seul morceau), pensez à prendre
- la largeur ;
- la longueur ;
- les retours (s'il y en a) ;
- un peu de marge au cas où.
L'option est disponible directement sur nos fiches produits. Sinon, vous avez aussi l'option de la commande au mètre linéaire. 😊
Attention aux adhésifs à motif : Vérifiez que le motif soit dans le sens que vous souhaitez. Le sens du motif est indiqué dans les images du produit.
Préparez votre zone de travail
Débarrassez votre plan de travail, enlevez les caches des prises et enlevez au mieux tous les éléments qui peuvent vous gêner pendant la pose. Bref, faites du propre ! 😉
Enfin, mettez à portée de main le matériel nécessaire pour la pose : De l'alcool isopropylique, un chiffon doux et propre, une raclette, un cutter.
Nettoyez et dégraisser minutieusement la surface
Cette étape est essentielle pour garantir la bonne tenue de votre adhésif sur votre crédence dans le temps. Une pellicule graisseuse empêchera la colle de parfaitement adhérer à la crédence. Enfin, si une impureté est présente, il y a des chances pour qu'elle provoque une bulle.
Vérifiez que l'adhésif soit à la bonne taille
Par précaution, déroulez votre adhésif et vérifiez que ses dimensions soient conformes à votre crédence.
Commencez l'application des 10 premiers centimètres. Marouflez bien de l'intérieur vers l'extérieur
En appliquant uniquement les premiers centimètres, vous réussirez mieux à bien positionner votre film au départ. Vous assurez donc le bon déroulement de la pose ensuite.
Il est très important de maroufler de l'intérieur vers l'extérieur pour chasser les bulles d'air !
Continuez la pose en y allant étape par étape, tous les 10 centimètres
N'allez pas trop vite, au risque de créer un pli. Avancez tous les 10 centimètres, enlevez le liner et marouflez. Recommencez cette étape jusqu'à la fin de la crédence.
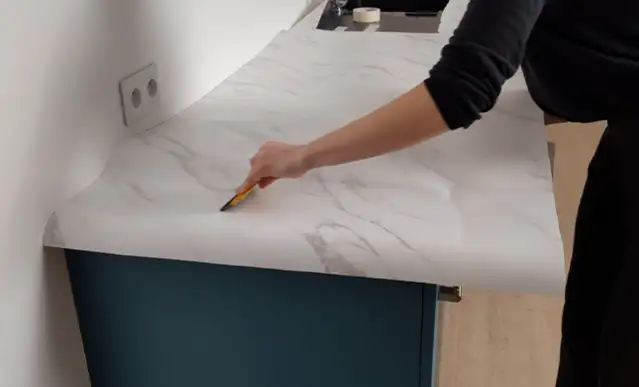
Appliquez les rebords si vous en avez, et découpez le surplus au cutter
Si votre crédence a un léger rebord, vous pouvez appliquer l'adhésif sur le rebord et couper à ras le mur. Aidez-vous de votre raclette ou d'un guide de découpe pour couper droit.
Changez la lame de votre cutter avant de commencer à couper. Vous aurez une découpe propre et nette.
Option : Appliquez un joint silicone entre la crédence et le plan de travail
Le joint permettra à votre crédence de bien être étanche en cas d'eau stagnante sur le plan de travail. Cela peut arriver autour du lavabo.
Admirez le résultat !
Bravo, vous avez transformé votre crédence avec du revêtement adhésif ! Vous êtes un vrai champion. 🏆
N'hésitez pas à nous partager votre réalisation ! Chaque mois, le concours photo mensuel offre 100€ 💶 en bon d'achat sur notre site internet à la personne qui met le mieux en valeur nos produits en photo. 📸